Is your Suburban hot water system turned off??
On an Outback trip some time ago were surprised to find that one of our 9 kg gas bottles had run out long before it should have, fearing a gas leak I checked all connections and lines closely, (using soapy water in a spray bottle, not a cigarette lighter!) found nothing and simply decided we had used the gas up. It wasn't until a week later that I realized what happened.
We were in an isolated campground out along the Warrego Highway in western Queensland when, during the wee hours on one of my regular visits to the 'little room', I was a little surprised to hear one of our neighbours gas hot water systems heating up. Surprised as I hadn't heard an RV arrive, must have been sleeping like a baby... XXXX Gold induced. Lol.
I thought little more of it until the morning when I saw that we actually didn't have any nearby neighbours!, It dawned on me over toast and coffee that I had been hearing our own gas hot water system firing up, some unnamed fool had neglected to turn it off before hitting the sack. It is also likely we had left it turned on while spending several days away from the 'van sightseeing.
The American made Suburban Hot Water System is a great device, it doesn't take long to heat up the water stored inside and it does it quite silently, at 23 litres we find we can easily get our two showers and wash the dishes...just few ticks and the sparker gets it going and in not too long the flame goes off with a 'poof once the water is hot enough, we would not be without a HWS'.
But. There is an issue, I tend to think it might be poor design actually: when you turn the HWS on an amber LED glows on the switch panel, it stays on until the igniter has the flame going, a few seconds usually at which time this light goes out....but, the system is still activated and once the water cools it will start up again automatically unless users remember to switch it off.
I have come up with a solution, a bit of thought and I knew what I had to do to fix it, anyone with a little low voltage wiring experience and some basic tools can do it too.
Click each photo below for a larger view.
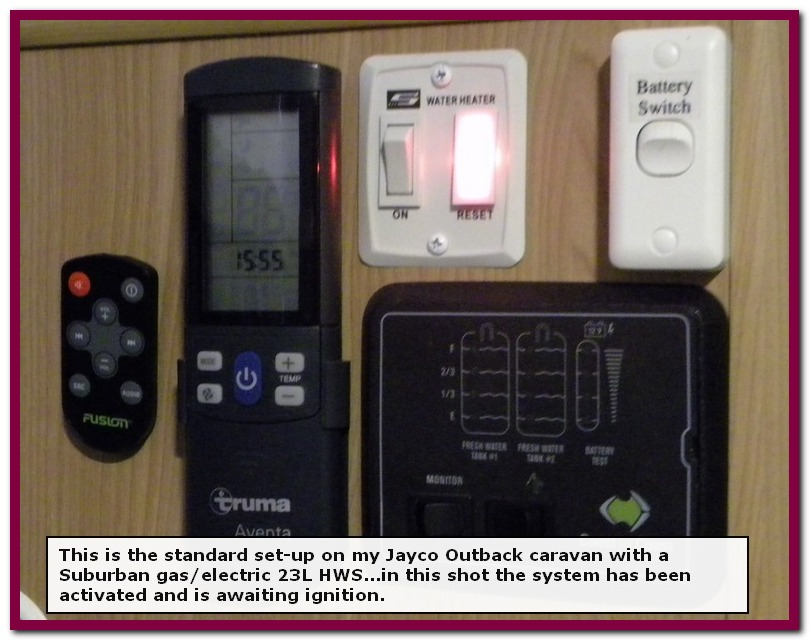
This is the Hot Water System (HWS) control panel as installed in our Jayco Outback caravan. There are probably different panels around but this one is quite common across the Jayco (and others) range. In this photo the system is activated, the switch is in the 'on' position and the indicator light glows, when the gas ignites (about 5 secs) this indicator lights goes out, however the switch is still 'on' of course and the system is still active.
To the right you can see that the amber LED has now gone out but a new green LED, (the one I have installed) is glowing...it will stay on and thereby give an indication the HWS is still activated.
Turning the, now unlit, switch to the off position will extinguish it. The new green LED will only glow when the HWS is activated.
This is quite a simple job and took me around an hour to complete.
Tools required:
- Wire strippers,
- Phillips screwdriver No 2
- Optionally, a length of light string or cotton.
- A multimeter (might be required if you are not sure about the wiring).
- A soldering iron and solder.
I do think the wiring (pos - neg) are pretty much standard but the coloring may vary.
Of course any auto electrician will do this for you too, so feel free to print this information as required.
Warning...ensure you disconnect your shore power (230 vac) connection before proceeding Their may be live wires behind your panel. (Microwave GPO for example).
Note, isolating your battery including disconnecting from the tow vehicle is probably a good move here too. Short circuits can be a pain.

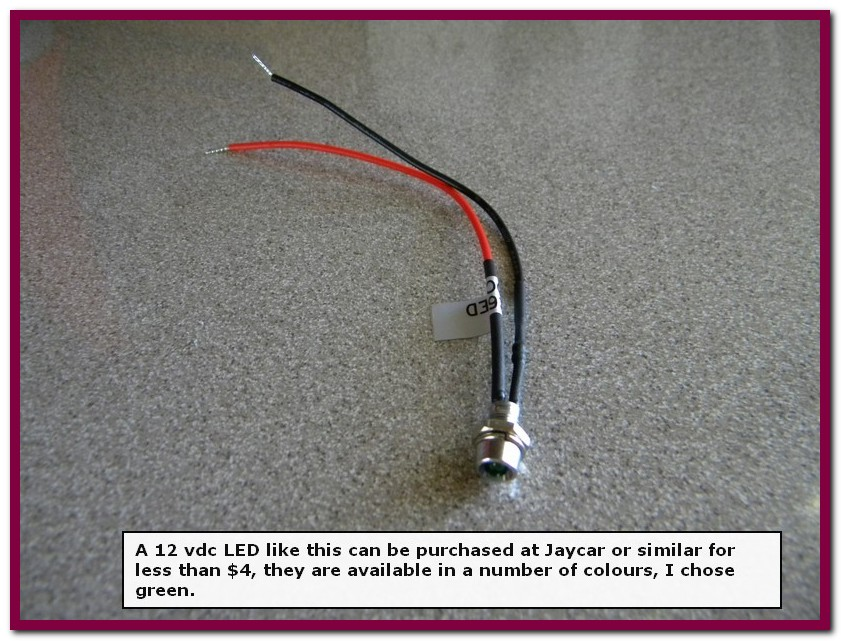
Firstly, I popped into Jaycar and brought a small LED indicator. It cost all of $3.45!! I used green but they are available in blue, amber and red.
Remove the switch panel, just two screws...click the photo to the right twice, for a better view.
At the rear of the panel there are four connectors...on the left hand side there is a blue wire (12v pos) at the bottom, on the right hand side at the top there is a terminal with two white wires (12v ground) .
It is between these two terminals that you will connect your LED, the LED has two wires, red (12 vdc pos) and black (ground).
I cheated a little here, I found I was able to insert the tiny LED wires into the existing push-on connectors behind the switch panel, (I had 'tinned' the wires first, you may prefer a more 'professional' approach by connecting directly to the wire but I doubt that they will be able to drop out, * they fit very snuggly, and there is not a lot of wriggle room there.

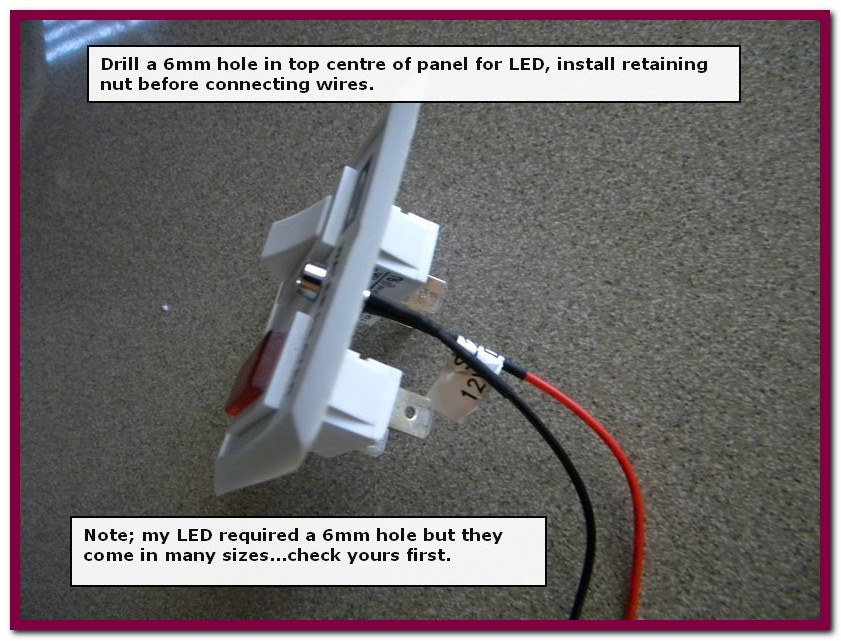
Next, using a 6 mm drill I put a hole in the plastic panel to accept yur LED. You will need to measure your LED holder to check the size
One thing to be careful of here, when you disconnect the wires from behind the switch as you will do in order to easily and accurately drill the hole, be very careful that they don't drop back through the hole on the wall, I think they would be a 'bitch' to retrieve. You may consider tying a length of string or cotton to them.
And that's it...simply check to see if it all works properly and away you go.
Note, I did this modification quite some time ago, 52'000 km later and it has worked satisfactorily. PG Nov '25
Additional notation;
A point I had not considered has been brought to my attention by a reader:
It might be that, if you are RVing in a cold climate where water may freeze it might well be advantageous to actually leave the hot water system activated. This definitely makes sense, I would image the gas usage would be greater if it was required to thaw frozen water rather than the occasional automatic start up.
I would like opinion from readers on this matter. Contact form on Home page.
Create Your Own Website With Webador